Assembly Instructions
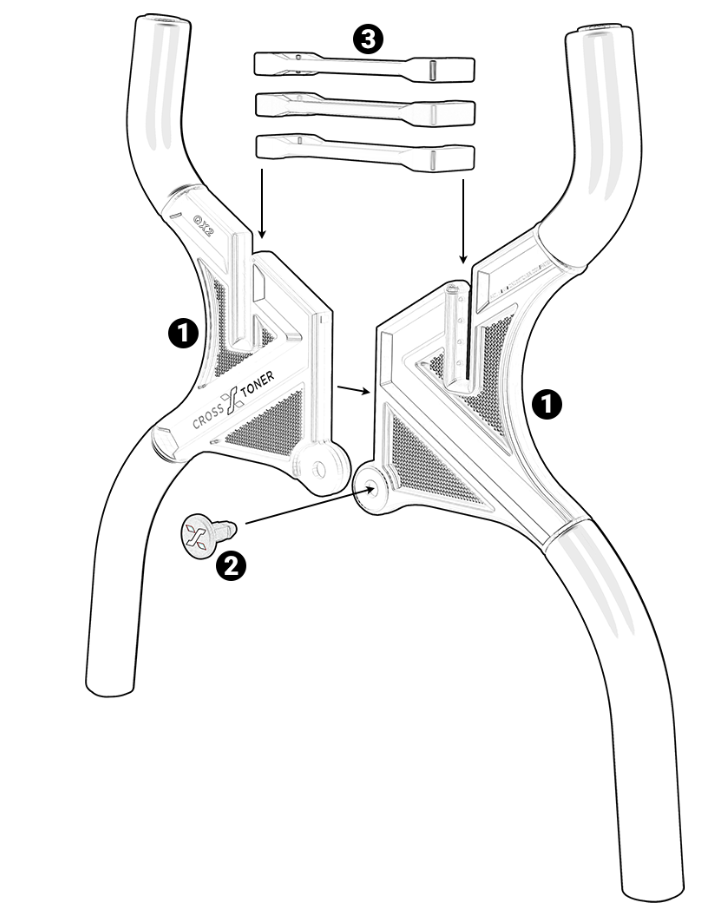
STEP 1 — Interlock the Arm Assemblies
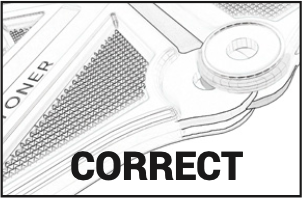
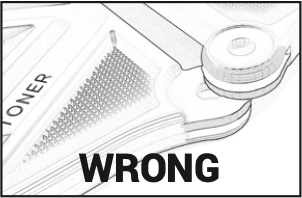
Position the arm assemblies (1) as shown in Figure 1.
Slide the arms together until they fully interlock.
Do not overlap the arms; they must interlock securely.
Note: Keep fingers clear of the hinge area while aligning the arms.
STEP 2 — Insert the Retaining Pin
With the arms interlocked, insert the retaining pin (2) into the mounting hole and press until it snaps into place. Make sure the pin is fully seated and cannot slide out.
To remove the pin, pinch the ends together and push it out of the holes.
STEP 3
Attach one or more resistance bands (3) to the band slots as shown in Figure 1.
New resistance bands may require firm pressure to install into the band slots. If additional assistance is needed, a small amount of a household lubricant (such as petroleum jelly) may be applied to the bands and the slots to reduce friction and make the bands easier to insert.
STEP 4
Proceed to the Basic Exercises section to learn basic movements and start using your Crosstoner QX2.